Speed up your Nuxt3 application with Pinia
11 May 2023
Index
What is Pinia and why you need it 🍍
Pinia is a state management pattern and library for Vue.js applications, and it can be particularly useful in Nuxt3 projects.
Here are some reasons why you might want to consider using Pinia in your Nuxt 3 project:
- Improved state management ⚡️: Pinia provides a centralized store for managing application state, allowing you to organize and access your data in a structured manner. It offers a more modern and type-safe approach compared to traditional options like Vuex. With Pinia, you can define multiple stores to represent different areas of your application's state, making it easier to manage and maintain your data.
- Composition API integration ⚙️: Pinia is designed to work seamlessly with the Composition API, which is the recommended way of writing Vue applications, including Nuxt 3 projects.
- Type safety 🔏: Pinia embraces TypeScript and provides excellent type inference and type safety. If you're using TypeScript in your Nuxt 3 project, Pinia can help you catch potential errors and improve your development experience by providing type checking and autocompletion within your stores and components.
- Optimized for Nuxt 3 🚀: Pinia has been designed to work seamlessly with Nuxt 3. It integrates well with the new modular architecture of Nuxt 3 and can easily be set up to provide state management across different pages, layouts, and components.
- Flexibility and scalability 🤙🏻: Pinia offers a flexible and scalable approach to state management. You can define store modules, divide your application state into separate concerns, and compose them as needed.
Install and setup Pinia
I'll use npm, but as always you could use yarn or whatever.
npm install pinia @pinia/nuxt
To avoid any errors on development, you have to add this line of code in your package.json file:
"overrides": {
  "vue": "latest"
}
As any other Nuxt3 module, we just have to declare our module in the nuxt.config.ts/js file:
[nuxt.config.ts];

export default defineNuxtConfig({
  // ... other options
  modules: [
    // ...
    '@pinia/nuxt',
  ],
});
We're done with the installation ✅
Start using Pinia in you project
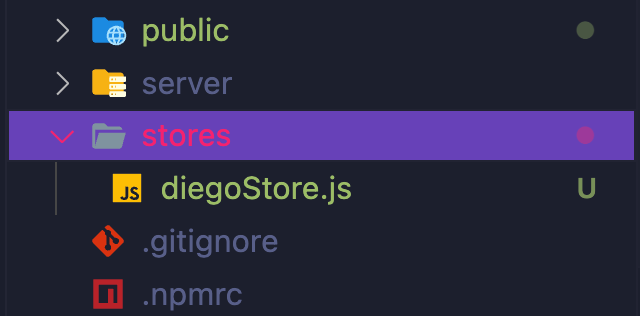
It's a good choice to maintain our Pinia stores in the /stores directory. So let's create our first store, I'm going to call it diegoStore.js, how egocentric am I?
To start, we've to define our new store, using the defineStore function that we should import from 'pinia'.diegoStore will be the unique id of our store that we'll use in the project components, and useDiegoStore will be the name of the return value of defineStore() function. Pinia docs recommend naming the return value with the word use at the beginning of the variable.
[diegoStore.js];

import { defineStore } from 'pinia';

export const useDiegoStore = defineStore('diegoStore', {
  // Options Object
});
Now, we can populate the Option Object with state, actions, and getters properties.
You can think in this way:
- state = data
- getters = computed properties
- actions = methods
It's easy isn't it? 😸
To use our new store we have to define it in our components because the store won't be created until use...Store() is called within a component <script> (or within setup() like all composables):
[Component.vue]

<script setup>
  import { useDiegoStore } from '@/stores/diegoStore';

  // access the `store` variable anywhere in the component
  const store = useDiegoStore();
</script>

<template>
  <div>
    <h1>{{ store.stateOne }}</h1>
    ...
  </div>
</template>
❌ IMPORTANT ❌
You can't use the syntax below because it will break the reactivity of your variables!
[Component.vue]

<script setup>
import { useDiegoStore } from '@/stores/diegoStore'
❌ const { stateOne, stateTwo, getterOne, actionOne } = useDiegoStore()
</script>
Quick example
[diegoStore.js];

import { defineStore } from 'pinia';

export const useDiegoStore = defineStore('diegoStore', {
    // Options Object

    state: () => ({
        title: 'My shopping list'
        fruits: ['apple', 'orange', 'banana'],
        appleCounter: 2
    }),


    // or
    state: () => {
        return {
            ...
        }
    }

    // You can use the state property to access the state
    getters: {
        fruitList: (state) => {
            return  'I need this fruits: ' + state.fruits.join(', ');
        }
    }

    // In actions, you should use 'this' to access the
     // other options (state, getters or another action)
    actions: {
        addApple(){
            this.appleCounter++
        }
    },
});
Now we can use our store in any component:
[Component.vue]

<script setup>
  import { useDiegoStore } from '@/stores/diegoStore';
  const store = useDiegoStore();
</script>

<template>
  <div>
    <h1>{{ store.title }}</h1>
    <p>Today I need {{ store.fruitList }}</p>
    <p>I love apples, so I want {{ store.appleCounter }} of them.</p>

    <button @click="store.addApple">Add one apple to the shopping list</button>
  </div>
</template>
That's it! 🎉
If you wanna know more about Pinia 🍍, check the docs
 &
&